Original Post

forScore is coming to the Mac

In the hustle of our school semester starting, I forgot to post about possibly the most exciting app news I have heard this summer.

After writing about it and talking about it on the podcast for well over a year, I am pleased to say that forScore has announced they are making a native Mac app. It will be coming this fall, alongside their version 12 update. Read all about version 12 here...

forScore | forScore 12:

forScore comes to the Mac in a big way with a brand new, fully native experience built for some of the most advanced and powerful devices out there. forScore runs on macOS Big Sur, both on Intel and Apple Silicon-powered Macs, and it’s included with forScore for iOS and iPadOS as a universal purchase. That’s right—it’s absolutely free for everyone who has ever bought forScore.

IMG_2981.png

From the looks of it, forScore is using Apple's Catalyst technology, which allows iPad apps to be ported to the Mac.

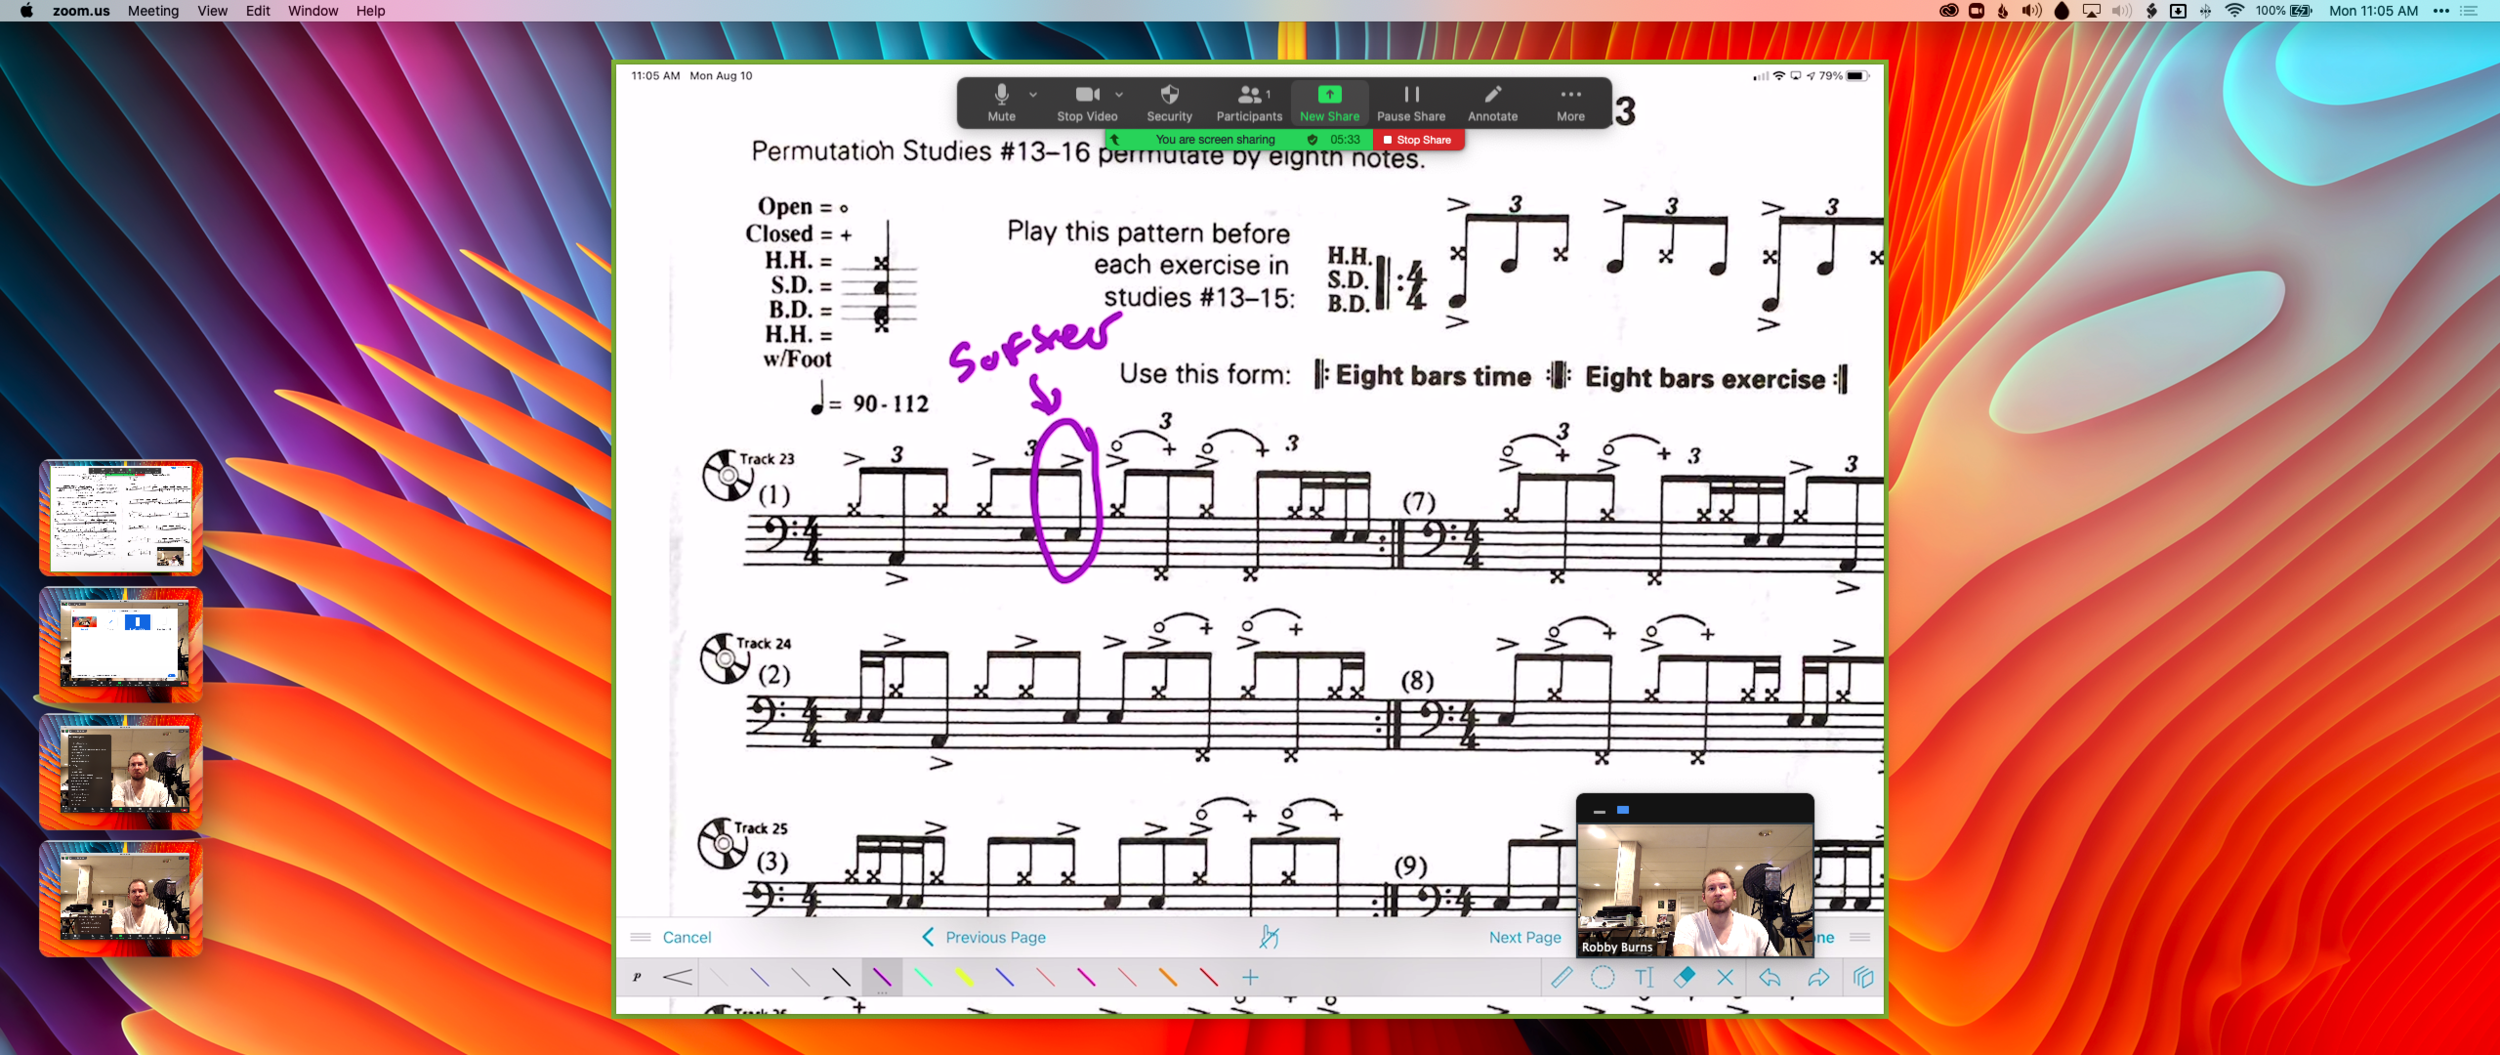
While I have not seen the Mac version of forScore, I have been testing the iOS version of forScore 12. It's great! My favorite small (but significant) feature is that you can now annotate while viewing two pages at a time without the app jolting into annotation mode. You just write directly on the screen with the Apple Pencil and your markings appear immediately.

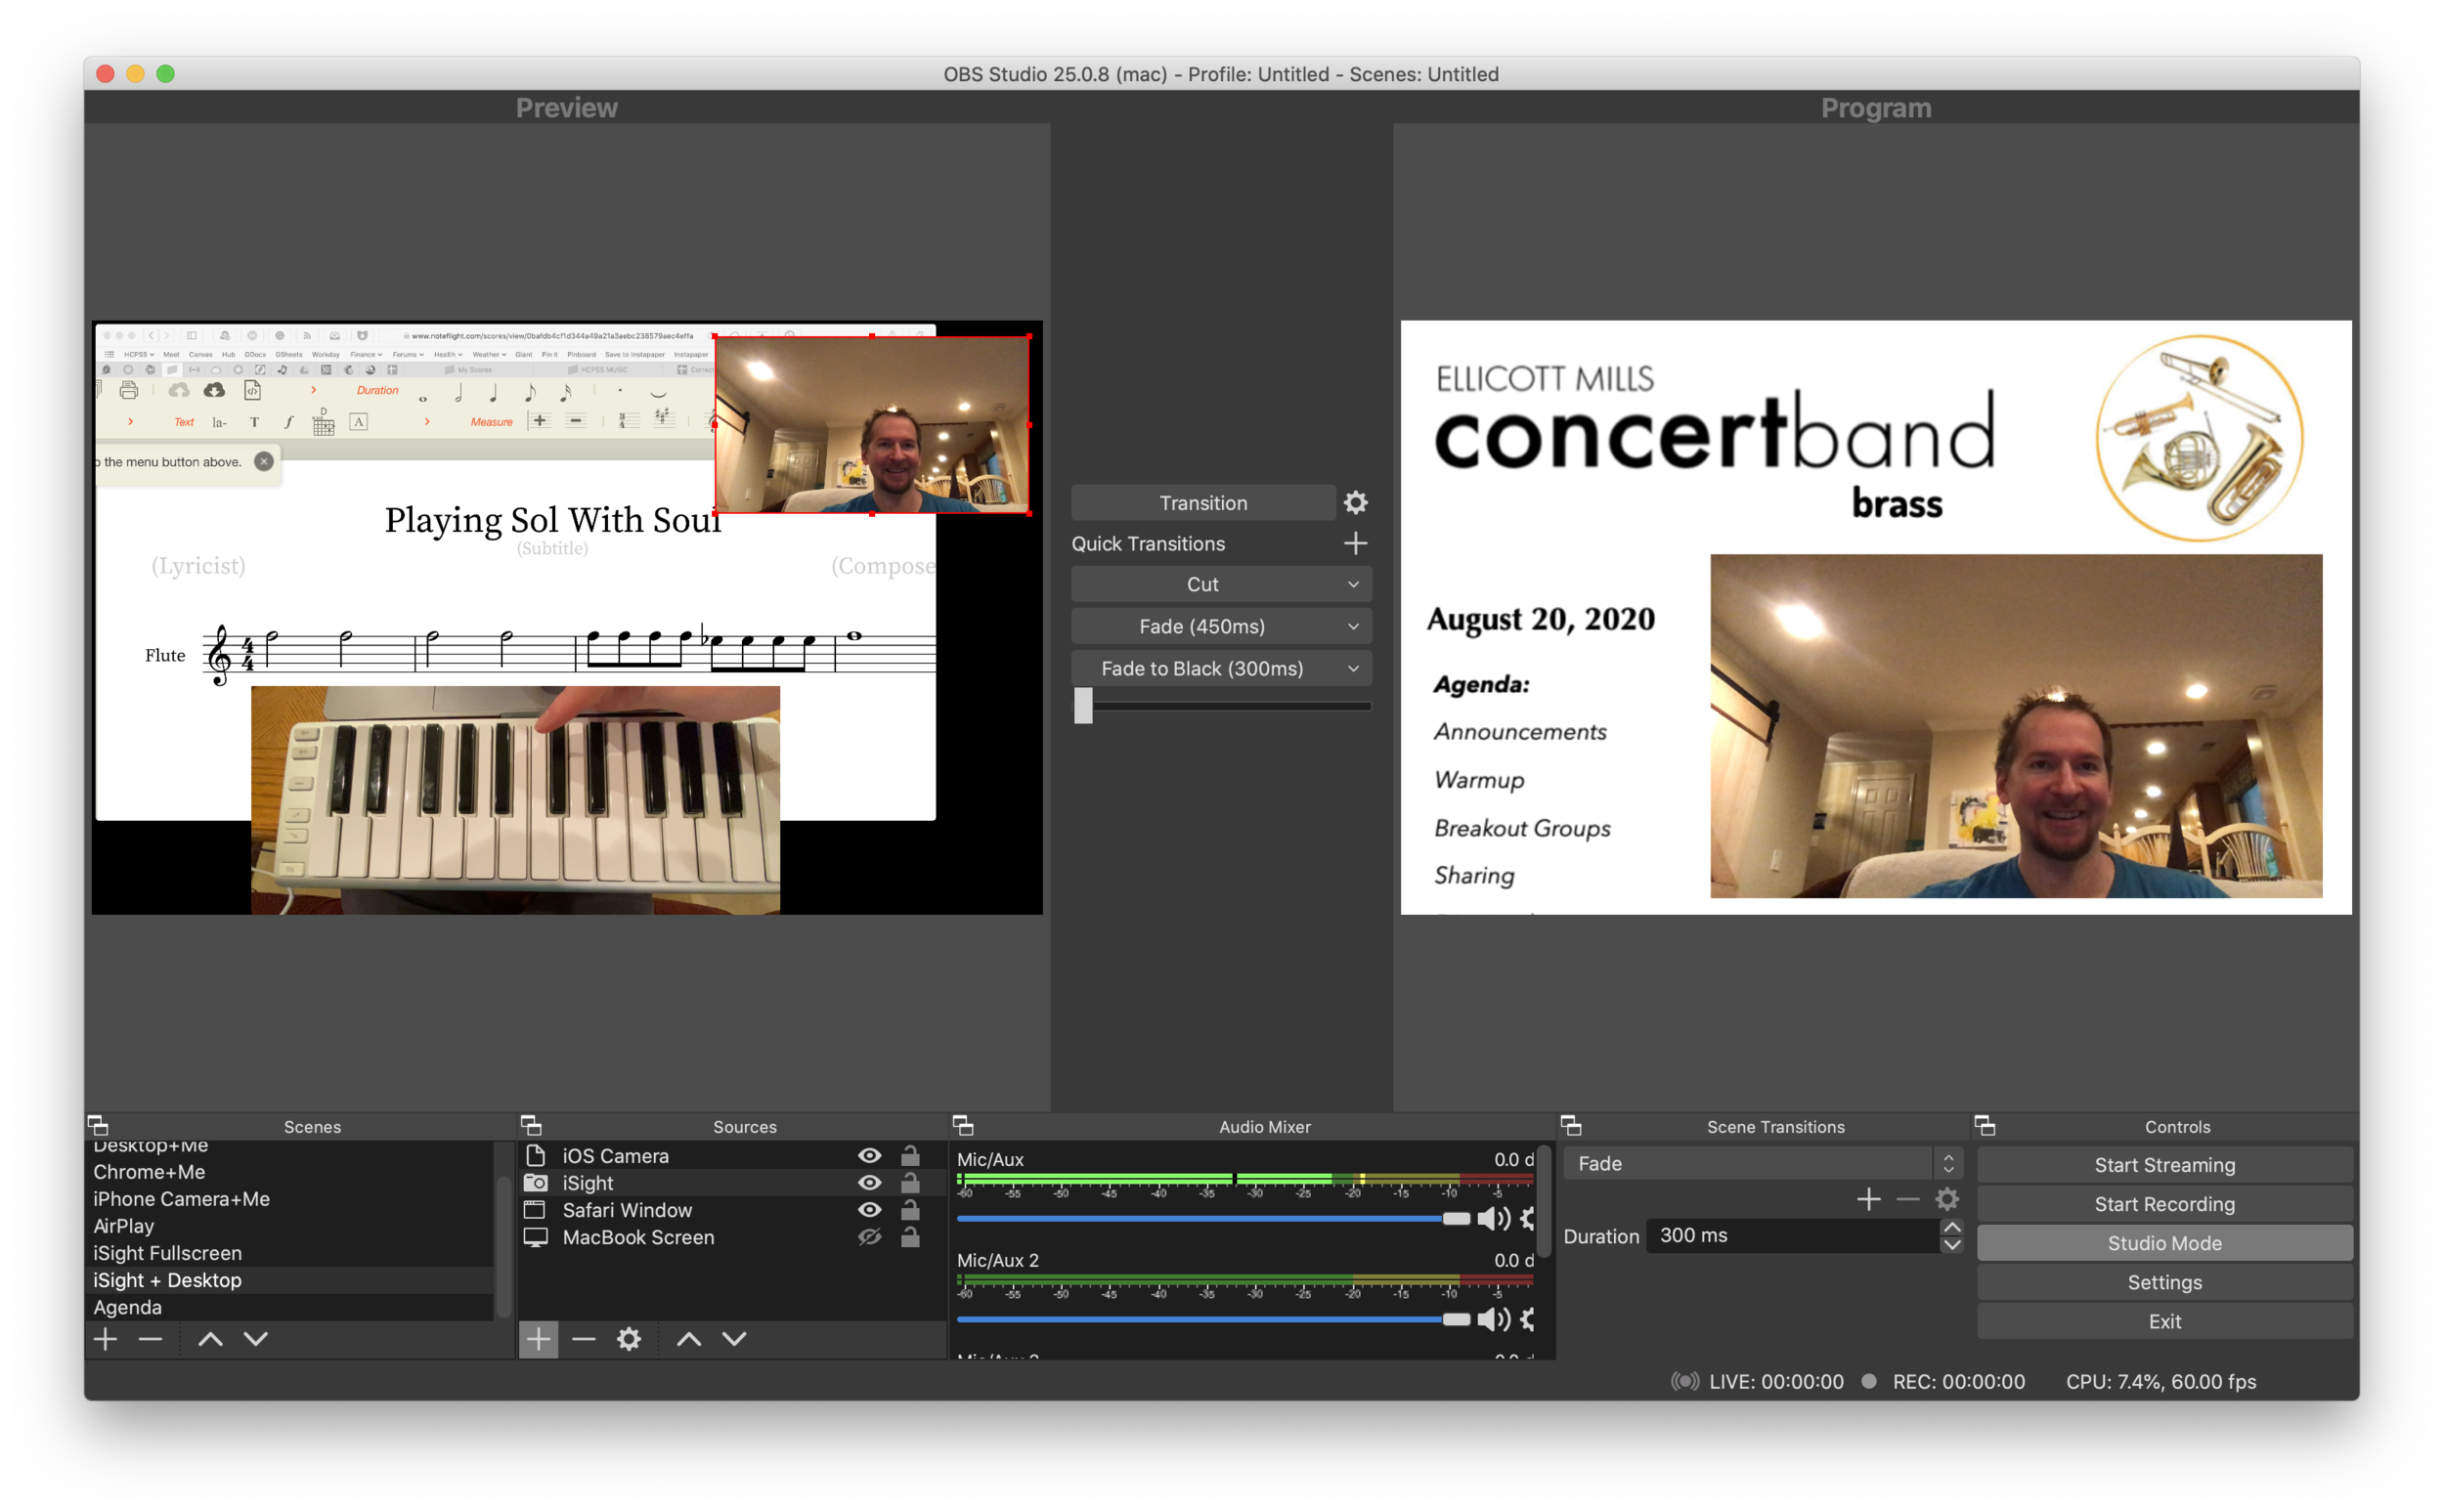
I store my score backups on my hard drive's file system, which is how I access them on the Mac. But I store my most frequently read scores in forScore on the iPad. I am glad the experience of interacting with my sheet music will now be consistent across both devices.

Something I have felt would need to happen for this to be useful is iCloud syncing. forScore says that is coming too...

Bringing forScore to the Mac is just the beginning—a whole new platform means a whole new set of opportunities. From subtle refinements to major new features already in development like iCloud Syncing, we’re building the future one step at a time.

We’re just getting started. Again.

Using a Mac version of the app with the need to maintain two separate score libraries would have been a nonstarter for me. As an added side benefit, I can see this getting me to use forScore on the iPhone. Its not the best screen size for sheet music, but every now and then, I'd like to be able to take it out of my pocket and reference a score real quick. The problem is that it is never real quick because none of my scores are there!

I could not be more excited about this announcement!

Automating Band Warmups, Teaching Auditory Skill, and Managing My Classroom… with Solfege Bingo

Intuition, I realized, was the certainty with which a skill instantly worked on the basis of rational experience. Without training, intuition does not develop. People only think that intuition is inborn. If intuition unexpectedly reveals itself, however, it is because unconscious training has been amassed somewhere along the way.
— Shinichi Suzuki , Nutured by Love

What is Solfege Bingo

Solfege Bingo is a game for young music students. You can play in class to help develop audiation, pitch recognition, and solfege.

CleanShot 2020-08-30 at 08.52.57@2x.png

The book comes with a series of bingo cards, each of which with three-note Solfege patterns in each square. “Do re mi, fa sol do, etc...” With the book comes a CD that has many different recorded examples of a singer singing these patterns, with space in between each pattern. Students match the three-note patterns they hear with the ones on their card until they get bingo.

The CD features a second set of recorded examples in which a clarinet plays the patterns so that the students must recognize the patterns by ear, not by syllable.

I first learned about this series as a student teacher, where the choir teacher would use them as warm-ups. She would use them as ear training examples to familiarize her ensembles with solfege. On the recorded examples, the space between each pattern is equal to the length of the patterns themselves, so you can use them as a call and response. The recording models the pattern, the choir sings it back.

Transposing the Tracks for Bands and Adding a Drone

A few years ago, I got the idea to transpose these recordings into band keys using GarageBand. I added a clarinet drone on the key center (using one of the software MIDI instruments) to help students hear the relationships of the pitches not only to each other but also to the tonic. 

In band, I start the year by implementing these play-along tracks during warm-ups, starting in concert Bb. I first use the vocalist track and have students sing back. Then they play it back, with brass buzzing on mouthpieces. Then with brass on instruments. (The repetition of this has the side effect of reinforcing fingerings.) Eventually, once I feel like they have begun to internalize the pitches, I play them the clarinet version of the recording. The clarinet drone rings through my entire track, which takes the place of my usual Tonal Energy Tuner drone.

It sounds like this when it’s done…

In GarageBand, I dragged in the audio file I wanted to edit, creating an audio track. Then, I created a second software instrument track, selected clarinet as the instrument, and held out the note Bb on my MIDI keyboard for the drone. Double-clickin…

In GarageBand, I dragged in the audio file I wanted to edit, creating an audio track. Then, I created a second software instrument track, selected clarinet as the instrument, and held out the note Bb on my MIDI keyboard for the drone. Double-clicking an audio region reveals a transpose option on the left. Dragging the slider moves the pitch up of the selected region up or down by a semitone.

Classroom Management (Making Two of Me)

I recall a year where I was struggling with engaging one of my band classes during the warm-ups. I needed a way to create some structure and reinforce expectations for the first 10 minutes of class, while making sure that the winds got the tone and ear development I wanted them to have. It is always easy to assume that students are against you when they are talking amongst themselves, wandering the back of the room, and slouching in their seats. I have come to find that, more often than not, my students aren’t against me, they just flat out didn’t understand my expectations for participation, posture, and technique and that they needed my support (even when it seems my expectations should be obvious). 

My solution was to duplicate myself. I needed there to be one of me on the podium guiding the rehearsal sequence, and another of me walking the room to adjust students’ expectations of themselves.

I added the Solfege Bingo play-along tracks to slides in my daily agenda presentation, which is always on display at the front of the room through a projector. I make all of my slides in Apple’s Keynote. I found that I could embed an mp3 of one of my tracks into a slide and set the presentation to automatically skip to the next slide after a certain length of time had passed. So I created a sequence of these Solfege Bingo tracks, and a couple of other typical warm-ups I do, and embedded them all in Keynote slides so that the warm-up would happen automatically. 

In the upper right corner, click the Transitions button to reveal transitions. From the Start Transition dropdown menu, you can choose to have a slide start automatically after a certain amount of time, using the Delay timer. You might have to tweak…

In the upper right corner, click the Transitions button to reveal transitions. From the Start Transition dropdown menu, you can choose to have a slide start automatically after a certain amount of time, using the Delay timer. You might have to tweak this a little bit to get it right, but the result is that these couple of Keynote slides play in a row, automatically, while I walk around the band room and give feedback to students.

This allows me to work the room. While warm-ups were taking place, I can walk in the percussion section and remind them what instrument they play for warm-ups that day (it's on the chart in the back of the room 🤷‍♂️). I can give postural feedback to my trombones. I can high five the tuba player. I can fit someone for a concert shirt. I can do nearly anything. And this is all while reinforcing audiation, tone development, and proper intonation.

I recommend the Solfege Bingo book. It’s effortless to modulate tracks with software. You can use the pitch-flex feature in GarageBand, as I mentioned above. But you can also use apps like Transcribe!, The Amazing Slow Downer, or Anytune

Adding a clarinet drone is easy. I added a software instrument track in GarageBand, set it to a clarinet, and played the tonic along to the recording. But you could also use Tonal Energy as a GarageBand instrument.

Conclusion

Given the time I am posting this, it is worth mentioning that I totally intend to use these warmup play-along tracks in my online band classes this fall, which will be taking place in Google Meet. I am using the Loopback app to route the audio of Keynote through to the call, and a soundboard app called Farrago to trigger them. I can run the tracks through Google Meet and everyone plays along while on mute. I am hoping to blog about Farrago soon.

I am also planning to blog about another version of this workflow I have tried in especially needy classrooms, where I go as far as to record myself giving instructions to the band in between transitions, and even program the tracks to rehearse concert music for me while the real ‘me’ works the room. I have run up to 40 minutes of a band rehearsal through pre-recorded instructions and play along tracks before!

Get a copy of Solfege Bingo here.

Watching YouTube Videos on Your iPhone or iPad in the Background While Doing Other Things

Most iPad video apps feature Picture in Picture mode (PiP), a feature that allows you to minimize the video in a corner of the screen while continuing to do work in other apps while watching or listening.

YouTube has been a holdout on this feature, even for YouTube Premium subscribers who get the background audio features (minus the background video). You can get PiP to work if you delete YouTube and watch on Safari instead (which is what I do).

Or, if you have the Scriptable app, you can also run this Siri Shortcut which will force a video you are watching in the YouTube app to open in Safari via PiP.

Or you could wait. It looks like YouTube might finally be testing their official support of PiP. Read MacRumors for more (and to learn how to force PiP by watching YouTube in Safari)...

YouTube Tests Native Picture-in-Picture Mode for iOS App - MacRumors:

YouTube appears to be testing Picture in Picture (PiP) mode for its iOS app, reports 9to5Mac. The feature allows users to watch YouTube videos while using other apps, and was discovered by developer Daniel Yount, who stumbled across it while viewing a YouTube live stream on his iPad.

Edit: This is only possible on iPhone if you are on iOS 14, which launches publicly this fall.

We watching some Paak while managing my tasks on iPhone.

We watching some Paak while managing my tasks on iPhone.

Eliminating Canvas Stress by Writing Content in Markdown

Left: A draft of a Canvas page, written in a text file on my computer. I used the Markdown syntax for headings, lists, and links. Right: What the Canvas page looks like once the text on the left is imported into the course page as HTML.

Left: A draft of a Canvas page, written in a text file on my computer. I used the Markdown syntax for headings, lists, and links. Right: What the Canvas page looks like once the text on the left is imported into the course page as HTML.

My district’s LMS of choice is Canvas, which is pretty stressful to work with. From most accounts I hear about other LMS software, Canvas is far from the worst. “You go to war with the LMS you have” I once heard.

Lately, I am writing my Canvas content in Markdown and storing it as text files on my computer.

Why?

Canvas is littered with user-hostile behaviors. Each class is a separate container. All files, pages, and assignments are quarantined, requiring multi-step procedures for sharing between courses. On top of this, the organizing tools are a mess. I am never 100 percent sure where to go. Even when I do, I have to wait for the internet to load each new thing I click on.

Instead of one file repository that all courses pull from, each class has its own separate Files area.

Instead of one file repository that all courses pull from, each class has its own separate Files area.

Canvas is equally difficult for students. All of the course pages and content are just sort of floating in space. It’s up to the teacher to link the material together meaningful, but the tools to do so are inelegant and unintuitive. My music program has resorted to a website for communicating most general information since it exposes the hierarchy of its structure to our viewers. In other words, we control where every page lives, and our students can get to any part of our site from the navigation bar at the top of the page.

The WYSIWYG web editors you see within most Canvas pages, assignments, and announcements are equally frustrating. They are clunky, the text field is tiny, the buttons for all the tools are ambiguous, and I lose my data if the page refreshes itself or I lose connection. Additionally, it’s hard to anticipate what my formatting will look like before actually clicking the save button.

Lately, I am writing my Canvas content in Markdown and storing it as text files on my computer. By editing in Markdown, I can create content in third-party apps, work with data offline, control where files are organized, search them from the Spotlight, and quickly export as HTML for input into the Canvas HTML editor when I am ready to publish.

Using Mac and iOS Native Apps

I like native applications because the good ones feel designed to look like the computing platform. For example, the forScore app on iOS uses similar navigation buttons and fonts to Apple’s own Mail, Keynote, Pages, and Notes. This way, I don’t feel like I am learning new software.

Native apps that deal with documents store files on my hard drive. I can easily organize them into my own folder system, work on them without an internet connection, open the same file in different applications, and search them from the Spotlight. Document-based apps update your file as you edit your data. Websites often lose your data when they run into issues.

I don’t write anything longer than a sentence or two into the text field of a website. Instead, I draft them inDrafts and move my work to iAWriter for longer projects. Both of these apps can preview Markdown.

What is Markdown?

Markdown is a shorthand syntax for HTML. It empowers me to draft web content without actually writing code. Skim this Markdown syntax guide to see what I mean. You can learn the basics in five minutes.

Drafts and iA Writer have one-button shortcuts to convert Markdown to formatted text or HTML. Here is an example of Markdown, and what it would look like once converted to rich text or HTML.

# Blog Post Title
Here are *three things* I want to do today.
1. Work out
2. Sit in the hot tub
3. Grill some chicken

Let me tell you more about them.

## Work out
Today I will work out on my bike. My wife once said, and I quote:
> The earlier in the day you aim to do it, the more likely it is to happen.

## Sit in the hot tub
This will be relaxing. Maybe I will listen to a podcast there. Here are some recent favorites...
- Sound Expertise
- Sticky Notes
- Upgrade

My favorite podcast player is [Overcast](https://overcast.fm).

Once an app like Drafts or iA Writer converts the Markdown to rich text, it would look like this:

A good Markdown app like iA Writer will convert the syntax to rich text for you and copy it so that you can paste it into an application like Google Docs, Microsoft Word, or your website.

A good Markdown app like iA Writer will convert the syntax to rich text for you and copy it so that you can paste it into an application like Google Docs, Microsoft Word, or your website.

I could have just as easily exported the resulting rich text to a Word document or Google Doc and all of the formatting would have been properly executed.

iAWriter can also export my Markdown as HTML like this:

<h1>Blog Post Title</h1>

<p>Here are <em>three things</em> I want to do today.</p>

<ol>
<li>Work out</li>
<li>Sit in the hot tub</li>
<li>Grill some chicken</li>
</ol>

<p>Let me tell you more about them.</p>

<h2>Work out</h2>

<p>Today I will workout on my bike. My wife once said, and I quote:</p>

<blockquote>
<p>The earlier in the day you aim to do it, the more likely it is to happen.</p>
</blockquote>

<h2>Sit in the hot tub</h2>

<p>This will be relaxing. Maybe I will listen to a podcast there. Here are some recent favorites...</p>

<ul>
<li>Sound Expertise</li>
<li>Sticky Notes</li>
<li>Upgrade</li>
</ul>

<p>My favorite podcast player is <a href="https://overcast.fm">Overcast</a>.</p>

Because Markdown can be converted to HTML automatically, I have found it less stressful to actually write my Canvas pages, announcements, and messages to parents in Markdown and then pasting the resulting HTML into the HTML editor of Canvas. I store my Markdown files in a folder of text files, with subfolders for each course. I have favorited these folders so that they are always accessible in the iA Writer sidebar. These folders are easily accessible. Because I am writing in plaintext, the result feels much more like writing in a simple note app than it does a word processor.

iA Writer links to folders of text files on your hard drive. But it looks like a simple note app.

iA Writer links to folders of text files on your hard drive. But it looks like a simple note app.

Here is an example of a Canvas announcement intended to be shared with one of my band classes early this fall. It contains an embedded Google Form families sign as an agreement to our policies. Markdown and HTML can be written in the same document and iA Writer treats it all as HTML when you export it.

I got the HTML embed straight from the Share menu of the Google Form setup. I didn't need to know any code to make this message!

On the left: a Markdown document that contains HTML code for a Google Form embed. On the right: pasting that as HTML into the HTML editor in Canvas.

On the left: a Markdown document that contains HTML code for a Google Form embed. On the right: pasting that as HTML into the HTML editor in Canvas.

How the resulting announcement appears to students.

How the resulting announcement appears to students.

EDIT: When I wrote this post, I fogtot to add one benefit to having all of these files on your computer… even though Canvas messages don’t support formatting like headings and bold, I draft those in iAWriter too. It is SO much easier to find and re-use old emails I have sent to parents when they are searchable from my computer. Have you ever tried to search your Canvas ‘Sent’ folder? It’s terrible! Local computer copies for the win!

Hyper-charging Online Classes with Open Broadcaster Software

OBS allows me to combine multiple sources into engaging scenes that I can easily transition between. The right video represents the scene that is live for my students to see in Google Meet. The left represents the scene I have queued up to go live w…

OBS allows me to combine multiple sources into engaging scenes that I can easily transition between. The right video represents the scene that is live for my students to see in Google Meet. The left represents the scene I have queued up to go live when I press a transition button.

In an effort to embellish my online teaching setup, I have been experimenting with Open Broadcaster Software. It's free on Windows and Mac and honestly not that hard to set up. 

It links seamlessly to most streaming services and by installing this plugin, you can have the output of your broadcast be the input of your Google Meet, Zoom, or Microsoft Teams classroom. This pairs really well with my Loopback workflow, which has now become the basis for all audio input in my online classes.

The sources that can make up your scenes.

The sources that can make up your scenes.

OBS allows you to create scenes that combine different video sources, graphics, backgrounds, and microphones, and rapidly switch between them. You could have a scene that is just your web cam's view of your face talking or another one that combines a window of your web browser with your webcam's view of your face in the lower right corner. You could even have an image from your hard drive as a graphic in the upper corner of a scene, or as a static image or background. 

The video on the right represents the live broadcast, whether that be a Twitch Stream, Facebook Live, or your end of a video call. 

The video on the left represents a preview of whatever scene you currently have selected. Pressing the transition buttons in between the two videos makes whatever is on the left go live. 

The scenes and transitions can make your videos look very professional. I am all about this idea of making my classes feel like a Twitch live stream. This is the online video language that holds people, particularly young people’s, attention. Why not try to imitate it if it makes for more engaging music experiences?

So far some of my scenes include:

  • Webcam: this one projects my face fullscreen

  • Chrome+Me: displays a Chrome window with my webcam feed in the lower corner

  • Desktop+Me: same as above but shows my entire screen instead of a Chrome window

  • AirPlay: using AirServer (directions here), I can stream my iPad screen to a scene

  • iPhone Camera: you can use this app to use your phone as a second camera angle, or just use AirServer and stream your phone with the camera app turned on

  • Agenda: a static image that represents what would usually be on the board when students enter the room… It's what they will see when they are joining the Google Meet in the opening minutes of class

  • And many slight variations of the above

Scenes and the sources that they contain.

Scenes and the sources that they contain.

David MacDonald (recent podcast guest) has a great scene where he puts an image of a piano keyboard layout on the bottom of the screen, underneath the view of his webcam. The keys light up blue when he plays them so his music theory students can get a clear idea of what he is talking about. I recommend you check out a post of his if you want to learn how to do it. This post is also more instructive about the steps you need to take to get up and running with OBS and is a great starting point if you want go to this path. Read here: Teaching Tech (Live Keyboard Overlay in Zoom) .

live-keyboard-demo-2.gif

OBS makes transitioning between these scenes really quick and engaging to watch. It's fun to combine the different sources so that a student can see my screen, my face talking, and an overhead view of my hands on a keyboard all at once. But even the act of transitioning between those three sources smoothly is a big enhancement alone.

OBS has a super helpful community on Reddit and Discord. I didn’t need them that much though. Googling most of my questions yielded quick results from the OBS user forum.

In Google Meet, Zoom, or Microsoft Teams, you can change the video source from your built in camera to the OBS virtual camera.

In Google Meet, Zoom, or Microsoft Teams, you can change the video source from your built in camera to the OBS virtual camera.

Edit: I have been using OBS and Keyboard Maestro in combination with the Elago Stream Deck and it is a dream! I hope to blog more about this device soon. See below for a demo of what I was able to get it to do in my first sitting.

Learn OmniFocus Workflow Guest: October 3, 2020

I am thrilled to announce that I will be joining Learn OmniFocus as a Workflow Guest on October 3rd, 2020.

Learn OmniFocus is a website dedicated to helping others live a fulfilling and productive life with OmniFocus, complementary productivity apps, and services.

You can learn a ton from their free resources, including basics like organizing tasks into projects and assigning tags to them. They also have information on advanced features like project templating and automation.

My session will be all about how I use OmniFocus and complementary productivity apps to keep my life as a teacher and musician together. Here is the session description:

Teacher, musician, and technologist, Robby Burns will be joining us from Ellicott City, Maryland to share how he uses OmniFocus and complementary productivity apps to keep his active life on track.

Robby has been using OmniFocus since 2010. He has a long history with Apple technologies and was originally drawn to OmniFocus’ deep integration with Apple’s operating systems. He especially appreciates that the Omni Group is quick to add support for new Apple technologies.

During the LIVE session, Robby will share details of his OmniFocus setup and workflows, including:

  • How and when he uses OmniFocus on his iPhone, iPad, and Mac.

  • Adjustments that he’s made to his use of OmniFocus and complementary productivity apps since switching from in-person to virtual teaching.

  • His strategy for using tags.

  • How he uses the Forecast perspective to keep his calendar lined up with his commitments.

  • How he uses defer dates to relieve the stress of seeing too many things at once.

  • Custom perspectives that help him hone in on his most important tasks, including his “Top 3” perspective that narrows his focus to only three items.

  • How he creates OmniFocus projects based on templates stored in Drafts.

Read more and register here. The session will have a live Q/A and members can interact and share ideas. I hope to see you there!

You can become a member of Learn OmniFocus here. They have educator and student discounts. It is worth checking out if you wish to be more productive!

A free recording of the video will be made available to everyone by October 10.

Music Diet, August 2020

An assortment of albums I have been listening to this month, so far...

Clear Line | Jacob Garchik

Symphonie Pacifique | Greg Foat

RoundAgain | Joshua Redman, Brad Mehldau, Christian McBride, Brian Blade

Jennifer Higdon Harp Concerto - American Rapture | Yolanda Kondonassis, The Rochester Philharmonic Orchestra & Ward

Some recently listened music in my Apple Music.

Some recently listened music in my Apple Music.

My Online Teaching Setup (High-Tech Edition)

My studio computer and associated hardware.

My studio computer and associated hardware.

When school let out in March, I wrote My Very Straightforward and Very Successful Setup for Teaching Virtual Private Lessons. The impetus for this post, and its snarky title, was an overwhelming number of teachers I saw on Facebook fussing about what apps and hardware they should use to teach online when all you really need is a smartphone, FaceTime, and maybe a tripod.

I stand by that post. But there are also reasons to go high-tech. I have had a lot of time this summer to reflect on the coming fall teaching semester. I have been experimenting with software and hardware solutions that are going to make my classes way more engaging.

Zoom

I have been hesitant about Zoom. I still have reservations about their software. Yet, it is hard to resist how customizable their desktop version is. I will be using Google Meet for my public school classes in September, but for my private lessons, I have been taking advantage of Zoom’s detailed features and settings.

For example, it’s easier to manage audio ins and outs. Right from the chat window, I can change if my voice input is going through my Mac's internal microphone or my studio microphone, or if video is coming from my laptop webcam or my external Logitech webcam. This will also be useful for routing audio from apps into the call (we will get to that in a moment).

Zoom allows you to choose the audio/video input from right within the call.

Zoom allows you to choose the audio/video input from right within the call.

Zoom also allows you to AirPlay the screen of an iOS device to the student as a screen sharing option. This is the main reason I have been experimenting with Zoom. Providing musical feedback is challenging over an internet-connected video call. Speaking slowly helps to convey thoughts accurately, but it helps a lot more when I say “start at measure 32” and the student sees me circle the spot I want them to start in the music, right on their phone.

You can get really detailed by zooming in and out of scores and annotating as little as a single note. If you are wondering, I am doing all of this on a 12.9 inch iPad Pro with Apple Pencil, using the forScore app. A tight feedback loop of “student performance—>teacher feedback—>student adjustment” is so important to good teaching, and a lot of it is lost during online lessons. It helps to get some of it back through the clarity and engagement of annotated sheet music.

Selecting AirPlay as a screen sharing option.

Selecting AirPlay as a screen sharing option.

AirPlaying annotated sheet music to the Zoom call using the iPad Pro and forScore app.

AirPlaying annotated sheet music to the Zoom call using the iPad Pro and forScore app.

As much as I love this, I still think Zoom is pretty student hostile, particularly with the audio settings. Computers already try to normalize audio by taking extreme louds and compressing them. Given that my private lessons are on percussion instruments, this is very bad. Zoom is the worst at it of all the video apps I have used. To make it better, you have to turn on an option in the audio settings called “Use Original Audio” so that the host hears the student’s raw sound, not Zoom’s attempt to even it out. Some of my students report that they have to re-choose this option in the “Meeting Settings” of each new Zoom call.

If this experiment turns out to be worth it for the sheet music streaming, I will deal with it. But this is one of the reasons why I have been using simple apps like FaceTime up until this point.

My Zoom audio settings.

My Zoom audio settings.

My Zoom advanced audio settings.

My Zoom advanced audio settings.

Sending App Audio Directly to the Call

I have been experimenting with a few apps by Rogue Amoeba that give me more control over how audio is flowing throughout my hardware and software.

Last Spring, I would often play my public school students YouTube videos, concert band recordings from Apple Music, and warm-up play-alongs that were embedded in Keynote slides. I was achieving this by having the sound of these sources come out of my computer speakers and right back into the microphone of my laptop. It actually works. But not for everyone. And not well.

Loopback is an app by Rogue Amoeba that allows you to combine the audio input and output of your various microphones, speakers, and apps, into new single audio devices that can be recognized by the system. I wrote about it here. My current set up includes a new audio device I created with Loopback which combines my audio interface and a bunch of frequently used audio apps into one. The resulting device is called Interface+Apps. If I select it as the input in my computer’s sound settings, then my students hear those apps and any microphone plugged into my audio interface directly. The audio quality of my apps is therefore more pure and direct, and there is no risk of getting an echo or feedback effect from my microphone picking up my computer speaker’s sound.

A Loopback device I created which combines the audio output of many apps with my audio interface into a new, compound device called “Interface+Apps.”

A Loopback device I created which combines the audio output of many apps with my audio interface into a new, compound device called “Interface+Apps.”

I can select this compound device from my Mac’s Sound settings.

I can select this compound device from my Mac’s Sound settings.

Now I can do the following with a much higher level of quality...

  • Run a play-along band track and have a private student drum along
  • Play examples of professional bands for my band class on YouTube
  • Run Keynote slides that contain beats, tuning drones, and other play-along/reference tracks
  • and...

Logic Pro X

Logic Pro X is one of my apps routing through to the call via Loopback. I have a MIDI keyboard plugged into my audio interface and a Roland Octopad electronic drum pad that is plugged in as an audio source (though it can be used as a MIDI source too).

The sounds on the Roland Octopad are pretty authentic. I have hi-hat and bass drum foot pedal triggers so I can play it naturally. So in Logic, I start with an audio track that is monitoring the Octopad, and a software instrument track that is set to a piano (or marimba or xylophone, whatever is relevant). This way, I can model drum set or mallet parts for students quickly without leaving my desk. The audio I produce in Logic is routed through Loopback directly into the call. My students say the drum set, in particular, sounds way better in some instances than the quality of real instruments over internet-connected calls. Isn’t that something...

Multiple Camera Angles

Obviously, there is a reason I have previously recommended a set up as simple as a smartphone and a tripod stand. Smartphones are very portable and convenient. And simple smartphone apps like FaceTime and Google Duo make a lot of good default choices about how to handle audio without the fiddly settings some of the more established “voice conference” platforms are known for.

Furthermore, I can’t pick up my desk and move it to my timpani or marimba if I need to model something. So I have begun experimenting with multiple camera angles. I bought a webcam back in March (it finally just shipped). I can use this as a secondary camera to my laptop’s camera (Command+Shift+N in Zoom to change cameras).

Alternatively, I can share my iPhone screen via AirPlay and turn on the camera app. Now I can get up from my desk and go wherever I need to. The student sees me wherever I go. This option is sometimes laggy.

Alternatively, I can log in to the call separately on the iPhone and Mac. This way, there are two instances of me, and if I need to, I can mute the studio desk microphone, and use the phone microphone so that students can hear me wherever I go. I like this option the best because it has the added benefit of showing me what meeting participants see in Zoom.

Logging in to the Zoom call on the Mac and iPhone gives me two different camera angles.

Logging in to the Zoom call on the Mac and iPhone gives me two different camera angles.

SoundSource

This process works well once it is set up. But it does take some fiddling around with audio ins and outs to get it right. SoundSource is another app by Rogue Amoeba that takes some of the fiddly-ness out of the equation. It replaces the sound options in your Mac’s menubar, offering your more control and more ease at the same time.

This app is seriously great.

This app is seriously great.

This app saved me from digging into the audio settings of my computer numerous times. In addition to putting audio device selection at a more surface level, it also lets you control the individual volume level of each app, apply audio effects to your apps, and more. One thing I do with it regularly is turn down the volume of just the Zoom app when my students play xylophone.

Rogue Amoeba's apps will cost you, but they are worth it for those who want more audio control on the Mac. Make sure you take advantage of their educator discount.

EDIT: My teaching set up now includes the use of OBS and an Elago Stream Deck. Read more here.

Conclusion

I went a little overboard here. If this is overwhelming to you, don't get the idea that you need to do it all. Anyone of these tweaks will advance your setup and teaching.

This post is not specific about the hardware I use. If you care about the brands and models of my gear, check out My Favorite Technology to read more about the specific audio equipment in my setup.

Sound Expertise: A Podcast from Musicologist, Will Robin

CleanShot 2020-08-09 at 08.37.44@2x.png

Will Robin, an assistant professor of musicology at the University of Maryland’s School of Music, has a new podcast called Sound Expertise. It’s a platform for music scholars to talk about their research.

I have really been enjoying this show. It manages to go very deep, while remaining brief and accessible at the same time. I am talking about how the show can address systemic racism in music schools, and define the qualities of timbre that characterize “1980s” music, all while remaining around 45 minutes per episode.

And when I say accessible, I mean that I wouldn’t hesitate for a moment to recommend it to someone outside of the field of music.

Will is striking a really good balance with this show and I am learning new things each episode. Be sure to check it out!

You can subscribe with these links: Apple PodcastsStitcherSpotify


Learning New Software at Lynda.com

Summer break for a teacher is a great time to learn new things. Amongst a number of new interests and skills I have been exploring, I have been taking time to engage with some new software.

I have been using Lynda.com for over 10 years. They are an awesome video tutorial website that has engaging software classes that cover everything from Photoshop, to Final Cut Pro, to Microsoft Word. The list of apps you can learn is huge. I have learned most of the creative professional software I know from Lynda.

lynda-logo.jpeg

What I like about Lynda.com is that they provide downloadable exercise files to use with the class, and there is a transcript of every word the presenter says that you can search by text. Earlier this week, I was trying to brush up on slip editing in Logic Pro. I typed “slip editing” into the search of the Logic Pro X: Essential Training course and it took me straight to the video that discusses the feature.

Lynda classes don’t just include big creative apps. I have found entire classes on single plugins for digital audio workstations. When I was learning photography, not only did they have a class for Adobe Lightroom, they had a class on the fundamentals of exposure, and a class specific to navigating the operating system of my exact model of Canon camera (the EOS 60D).

Lynda.com is completely free with a library card in my area. It’s worth looking into if you want to use the service.

This summer, I have been learning Photoshop and Affinity Photo. These two apps do the same kind of work, but I have appreciated learning the underlying concepts from the industry standard (Photoshop), and then learning the tools and features in Affinity, which is way more intuitive. My goal is to feel less limited manipulating the graphics on my computer. My dream is to be able to create any document imaginable for my band program.

I can’t recommend Lynda enough. After Affinity Photo for Mac and iPad, I am off to learn Affinity Designer. Did I mention that you can also learn computer programing on Lynda? A brief list of classes I have taken there, off of the top of my head, includes:

  • Pro Tools

  • Sibelius

  • Logic Pro X

  • Final Cut Pro X

  • Google Docs

  • Waves Audio Plugins

  • Funamdnetals of Reverb

  • Fundamentals of EQ

  • Fundamentals of Dynamics Processing

  • Fundamentals of Exposure

  • Fundamentals of Lens

  • Adobe Lightroom

  • OmniFocus

  • OmniGraffle

IMG_2948.png