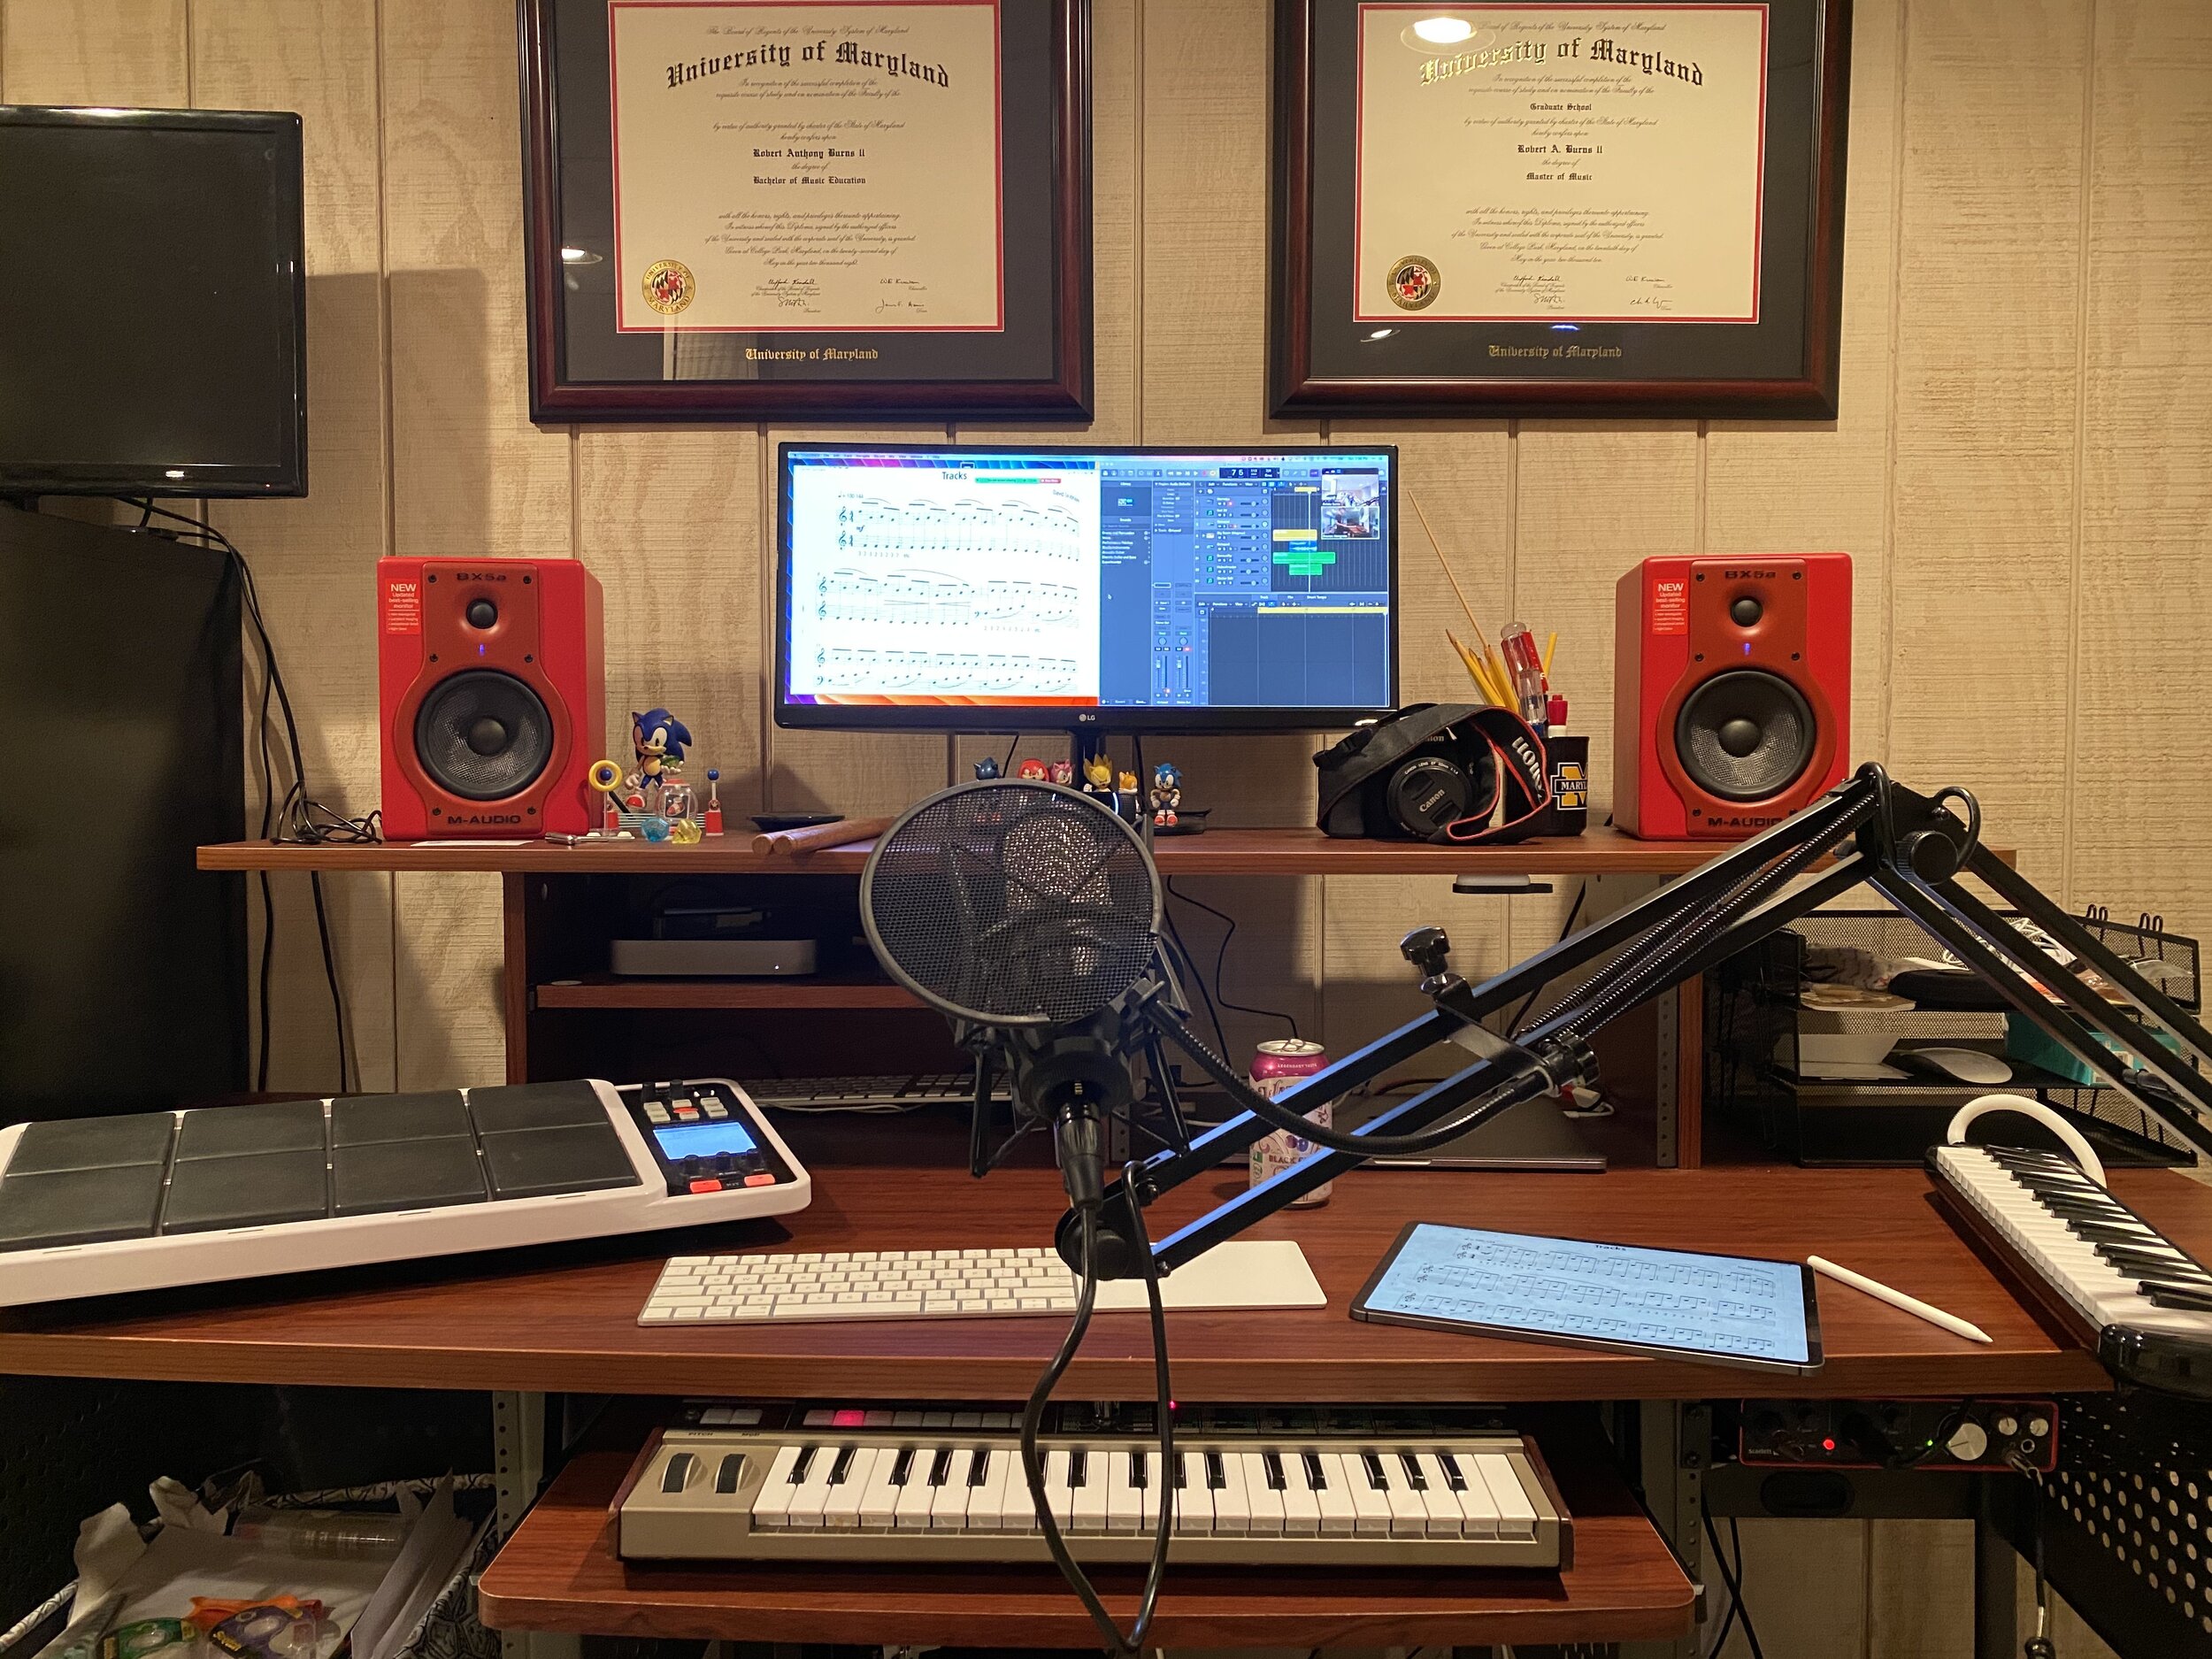
My studio computer and associated hardware.
When school let out in March, I wrote My Very Straightforward and Very Successful Setup for Teaching Virtual Private Lessons. The impetus for this post, and its snarky title, was an overwhelming number of teachers I saw on Facebook fussing about what apps and hardware they should use to teach online when all you really need is a smartphone, FaceTime, and maybe a tripod.
I stand by that post. But there are also reasons to go high-tech. I have had a lot of time this summer to reflect on the coming fall teaching semester. I have been experimenting with software and hardware solutions that are going to make my classes way more engaging.
Zoom
I have been hesitant about Zoom. I still have reservations about their software. Yet, it is hard to resist how customizable their desktop version is. I will be using Google Meet for my public school classes in September, but for my private lessons, I have been taking advantage of Zoom’s detailed features and settings.
For example, it’s easier to manage audio ins and outs. Right from the chat window, I can change if my voice input is going through my Mac's internal microphone or my studio microphone, or if video is coming from my laptop webcam or my external Logitech webcam. This will also be useful for routing audio from apps into the call (we will get to that in a moment).
Zoom allows you to choose the audio/video input from right within the call.
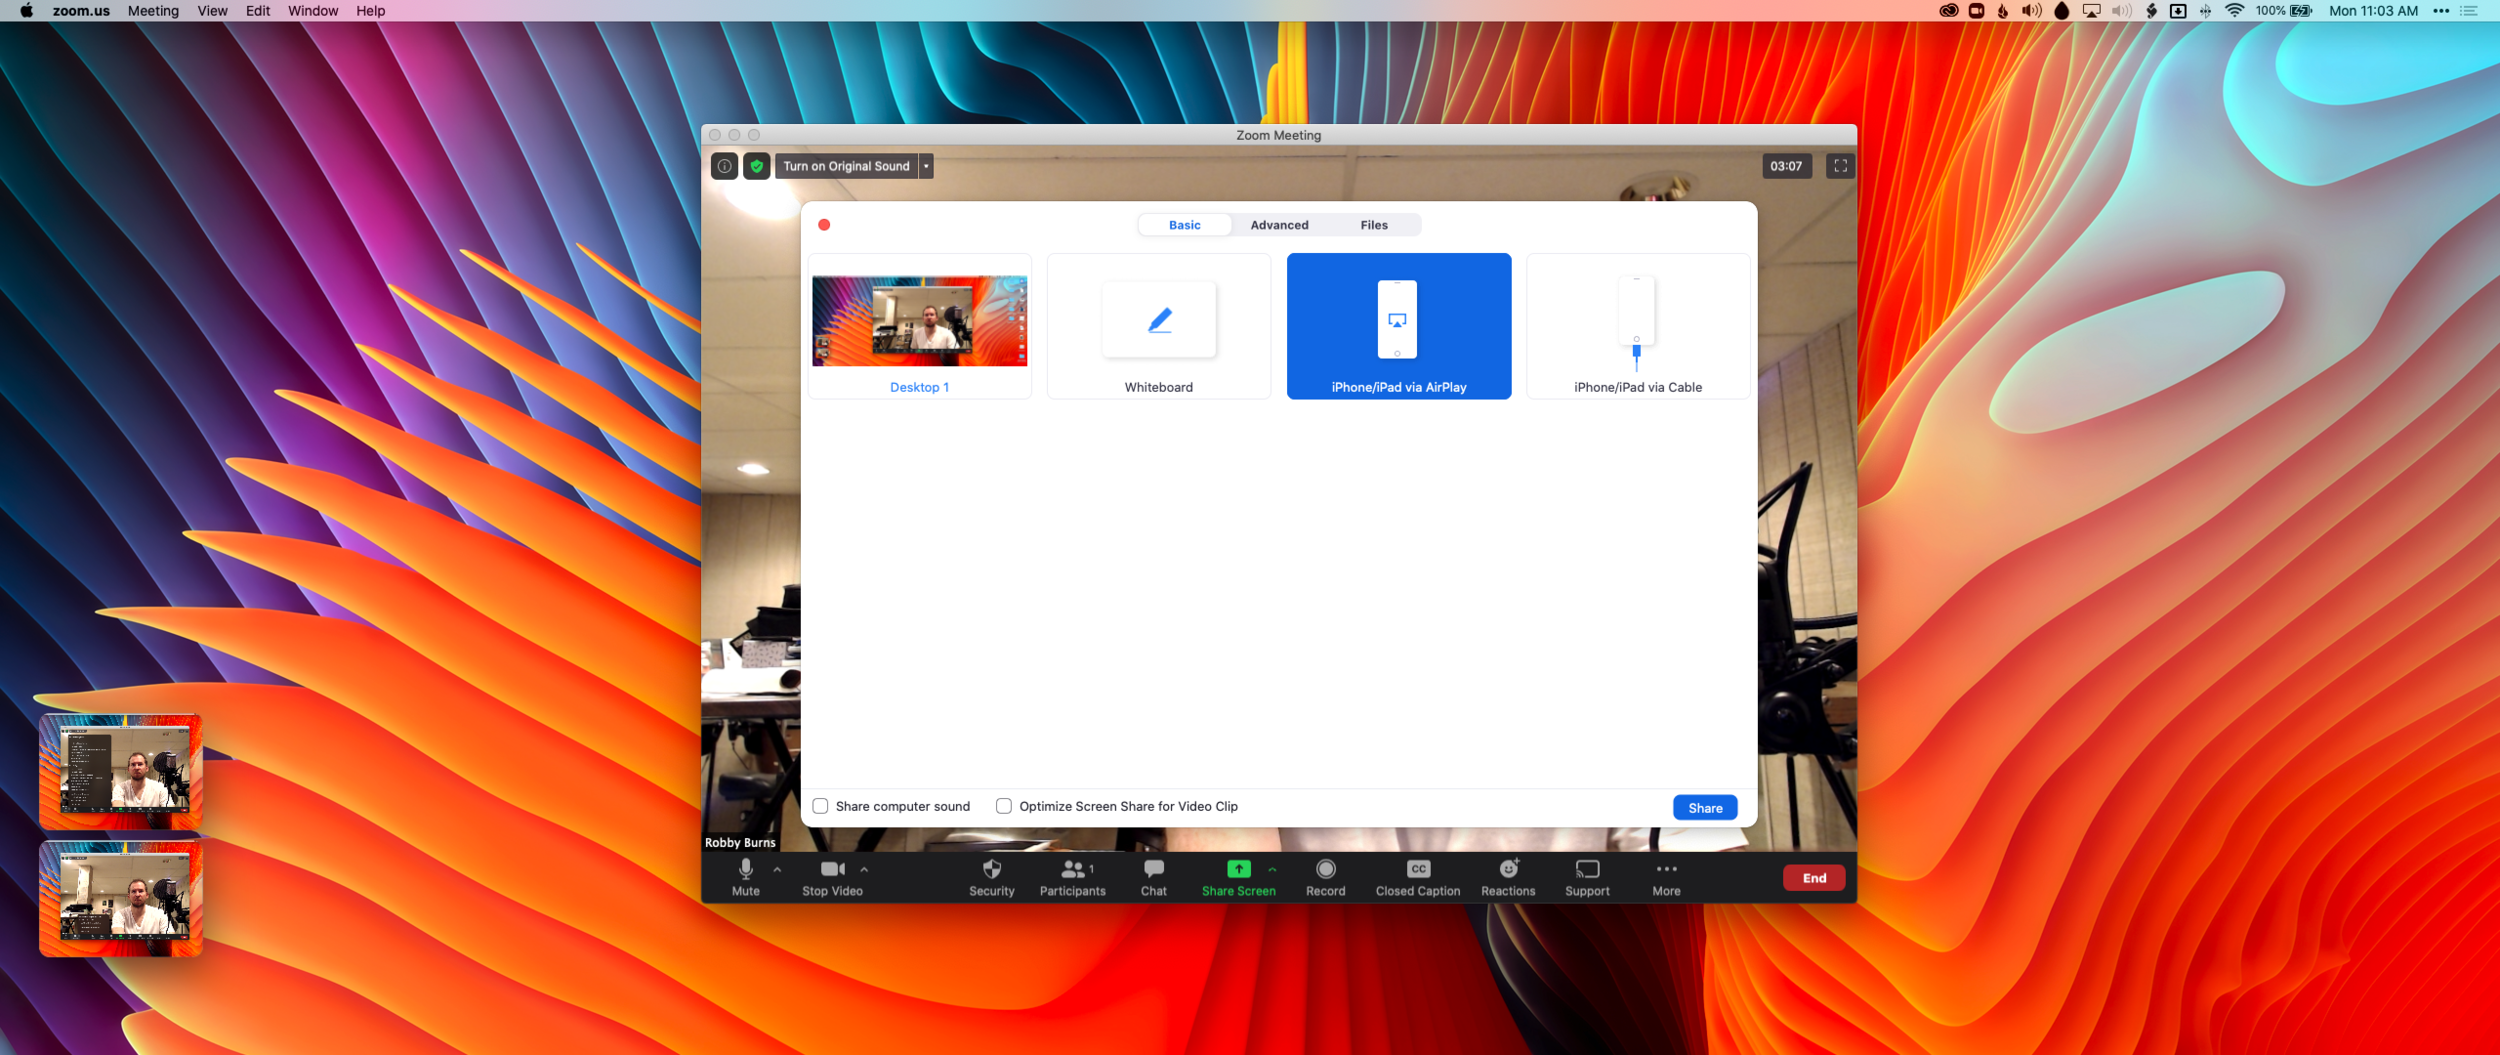
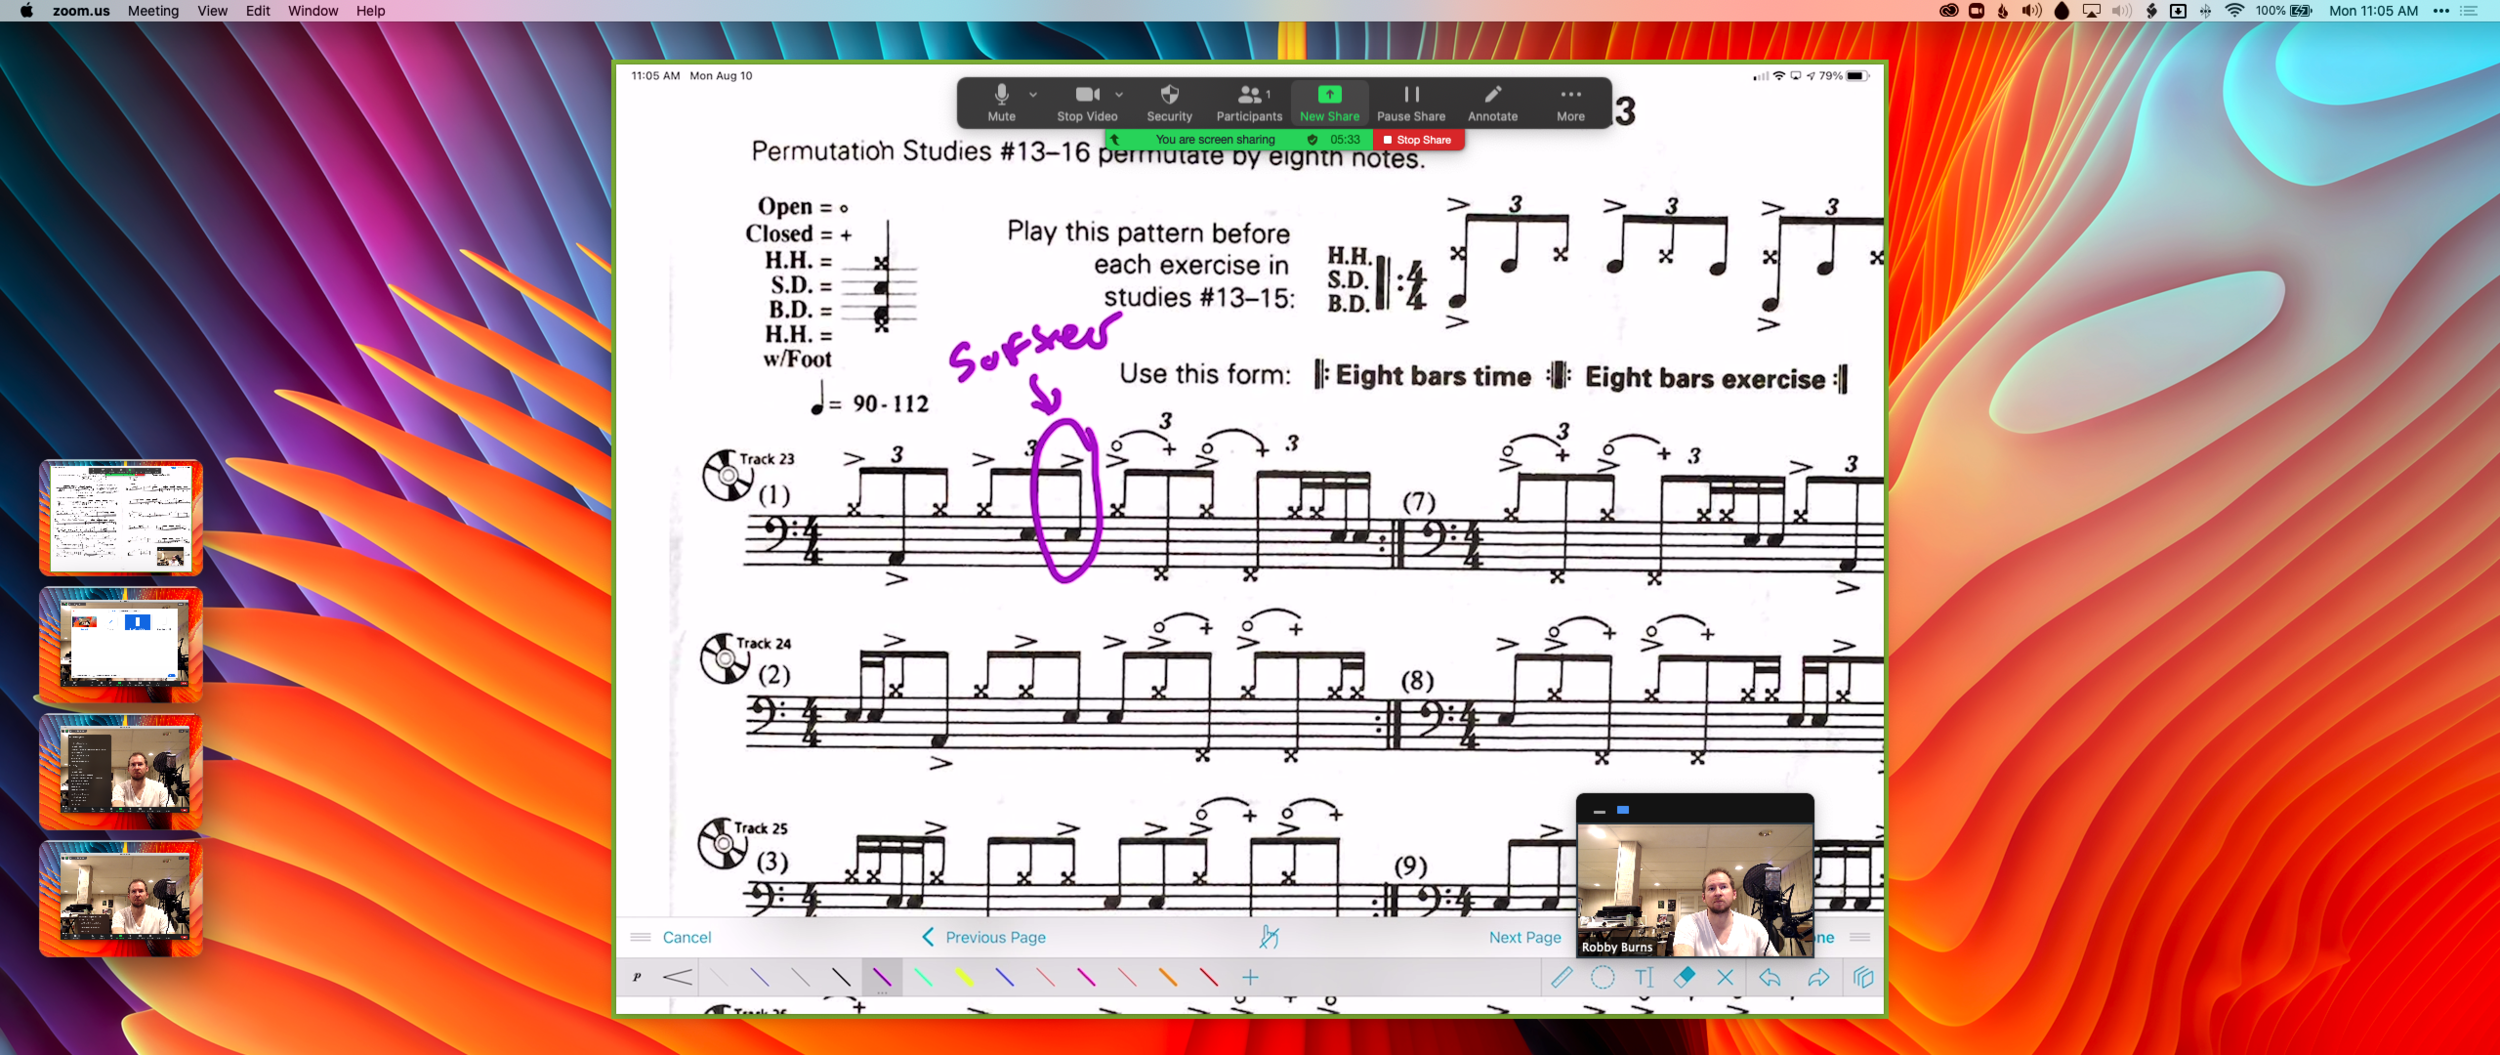
Zoom also allows you to AirPlay the screen of an iOS device to the student as a screen sharing option. This is the main reason I have been experimenting with Zoom. Providing musical feedback is challenging over an internet-connected video call. Speaking slowly helps to convey thoughts accurately, but it helps a lot more when I say “start at measure 32” and the student sees me circle the spot I want them to start in the music, right on their phone.
You can get really detailed by zooming in and out of scores and annotating as little as a single note. If you are wondering, I am doing all of this on a 12.9 inch iPad Pro with Apple Pencil, using the forScore app. A tight feedback loop of “student performance—>teacher feedback—>student adjustment” is so important to good teaching, and a lot of it is lost during online lessons. It helps to get some of it back through the clarity and engagement of annotated sheet music.
Selecting AirPlay as a screen sharing option.
AirPlaying annotated sheet music to the Zoom call using the iPad Pro and forScore app.
As much as I love this, I still think Zoom is pretty student hostile, particularly with the audio settings. Computers already try to normalize audio by taking extreme louds and compressing them. Given that my private lessons are on percussion instruments, this is very bad. Zoom is the worst at it of all the video apps I have used. To make it better, you have to turn on an option in the audio settings called “Use Original Audio” so that the host hears the student’s raw sound, not Zoom’s attempt to even it out. Some of my students report that they have to re-choose this option in the “Meeting Settings” of each new Zoom call.
If this experiment turns out to be worth it for the sheet music streaming, I will deal with it. But this is one of the reasons why I have been using simple apps like FaceTime up until this point.
My Zoom audio settings.
My Zoom advanced audio settings.
Sending App Audio Directly to the Call
I have been experimenting with a few apps by Rogue Amoeba that give me more control over how audio is flowing throughout my hardware and software.
Last Spring, I would often play my public school students YouTube videos, concert band recordings from Apple Music, and warm-up play-alongs that were embedded in Keynote slides. I was achieving this by having the sound of these sources come out of my computer speakers and right back into the microphone of my laptop. It actually works. But not for everyone. And not well.
Loopback is an app by Rogue Amoeba that allows you to combine the audio input and output of your various microphones, speakers, and apps, into new single audio devices that can be recognized by the system. I wrote about it here. My current set up includes a new audio device I created with Loopback which combines my audio interface and a bunch of frequently used audio apps into one. The resulting device is called Interface+Apps. If I select it as the input in my computer’s sound settings, then my students hear those apps and any microphone plugged into my audio interface directly. The audio quality of my apps is therefore more pure and direct, and there is no risk of getting an echo or feedback effect from my microphone picking up my computer speaker’s sound.
A Loopback device I created which combines the audio output of many apps with my audio interface into a new, compound device called “Interface+Apps.”
I can select this compound device from my Mac’s Sound settings.
Now I can do the following with a much higher level of quality...
- Run a play-along band track and have a private student drum along
- Play examples of professional bands for my band class on YouTube
- Run Keynote slides that contain beats, tuning drones, and other play-along/reference tracks
- and...
Logic Pro X
Logic Pro X is one of my apps routing through to the call via Loopback. I have a MIDI keyboard plugged into my audio interface and a Roland Octopad electronic drum pad that is plugged in as an audio source (though it can be used as a MIDI source too).
The sounds on the Roland Octopad are pretty authentic. I have hi-hat and bass drum foot pedal triggers so I can play it naturally. So in Logic, I start with an audio track that is monitoring the Octopad, and a software instrument track that is set to a piano (or marimba or xylophone, whatever is relevant). This way, I can model drum set or mallet parts for students quickly without leaving my desk. The audio I produce in Logic is routed through Loopback directly into the call. My students say the drum set, in particular, sounds way better in some instances than the quality of real instruments over internet-connected calls. Isn’t that something...
Multiple Camera Angles
Obviously, there is a reason I have previously recommended a set up as simple as a smartphone and a tripod stand. Smartphones are very portable and convenient. And simple smartphone apps like FaceTime and Google Duo make a lot of good default choices about how to handle audio without the fiddly settings some of the more established “voice conference” platforms are known for.
Furthermore, I can’t pick up my desk and move it to my timpani or marimba if I need to model something. So I have begun experimenting with multiple camera angles. I bought a webcam back in March (it finally just shipped). I can use this as a secondary camera to my laptop’s camera (Command+Shift+N in Zoom to change cameras).
Alternatively, I can share my iPhone screen via AirPlay and turn on the camera app. Now I can get up from my desk and go wherever I need to. The student sees me wherever I go. This option is sometimes laggy.
Alternatively, I can log in to the call separately on the iPhone and Mac. This way, there are two instances of me, and if I need to, I can mute the studio desk microphone, and use the phone microphone so that students can hear me wherever I go. I like this option the best because it has the added benefit of showing me what meeting participants see in Zoom.
Logging in to the Zoom call on the Mac and iPhone gives me two different camera angles.
SoundSource
This process works well once it is set up. But it does take some fiddling around with audio ins and outs to get it right. SoundSource is another app by Rogue Amoeba that takes some of the fiddly-ness out of the equation. It replaces the sound options in your Mac’s menubar, offering your more control and more ease at the same time.
This app is seriously great.
This app saved me from digging into the audio settings of my computer numerous times. In addition to putting audio device selection at a more surface level, it also lets you control the individual volume level of each app, apply audio effects to your apps, and more. One thing I do with it regularly is turn down the volume of just the Zoom app when my students play xylophone.
Rogue Amoeba's apps will cost you, but they are worth it for those who want more audio control on the Mac. Make sure you take advantage of their educator discount.
EDIT: My teaching set up now includes the use of OBS and an Elago Stream Deck. Read more here.
Conclusion
I went a little overboard here. If this is overwhelming to you, don't get the idea that you need to do it all. Anyone of these tweaks will advance your setup and teaching.
This post is not specific about the hardware I use. If you care about the brands and models of my gear, check out My Favorite Technology to read more about the specific audio equipment in my setup.


